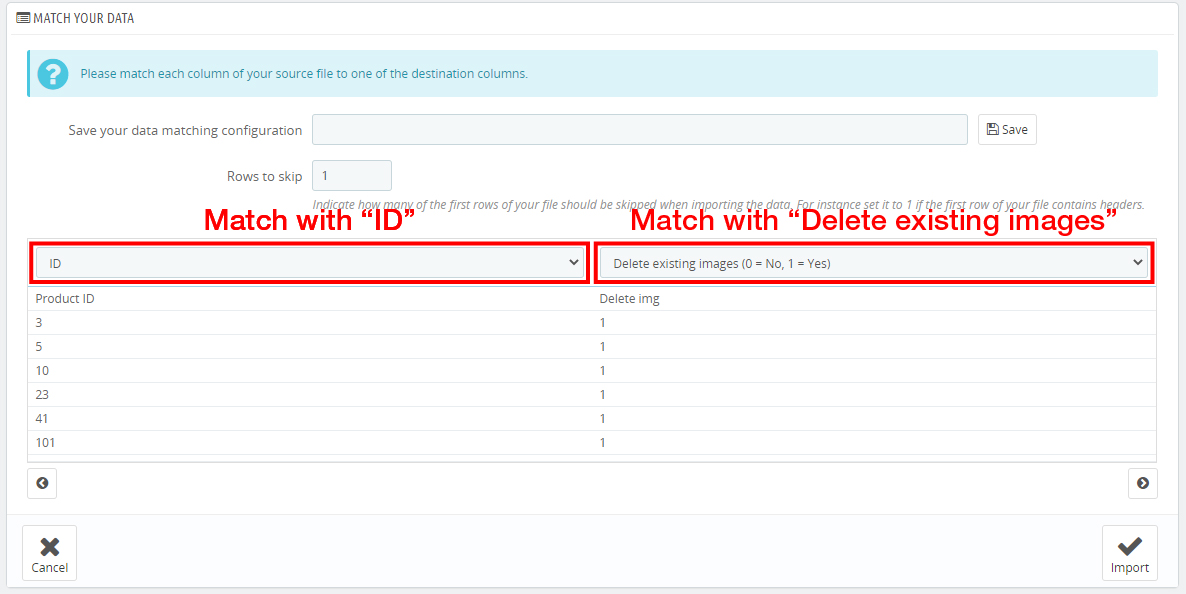


How to Delete All Image of Selected Products
CSV File
You may need to check the format of your CSV file. As it is called Comma Separated Values, the values in each row are separated with commas. However, sometimes it may be semi-colons instead. For example, the CSV file exported from PrestaShop Back Office is using semi-colon as the separator
You can simply check it by opening with a text editor like below.
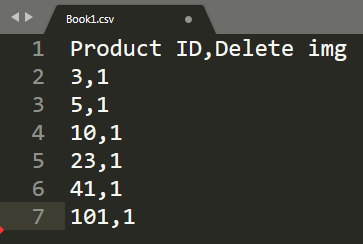
And you can find what is the separator.
Import Process
Go into the page under Advanced Parameters → Import, and let’s see how should we set the corresponding settings:
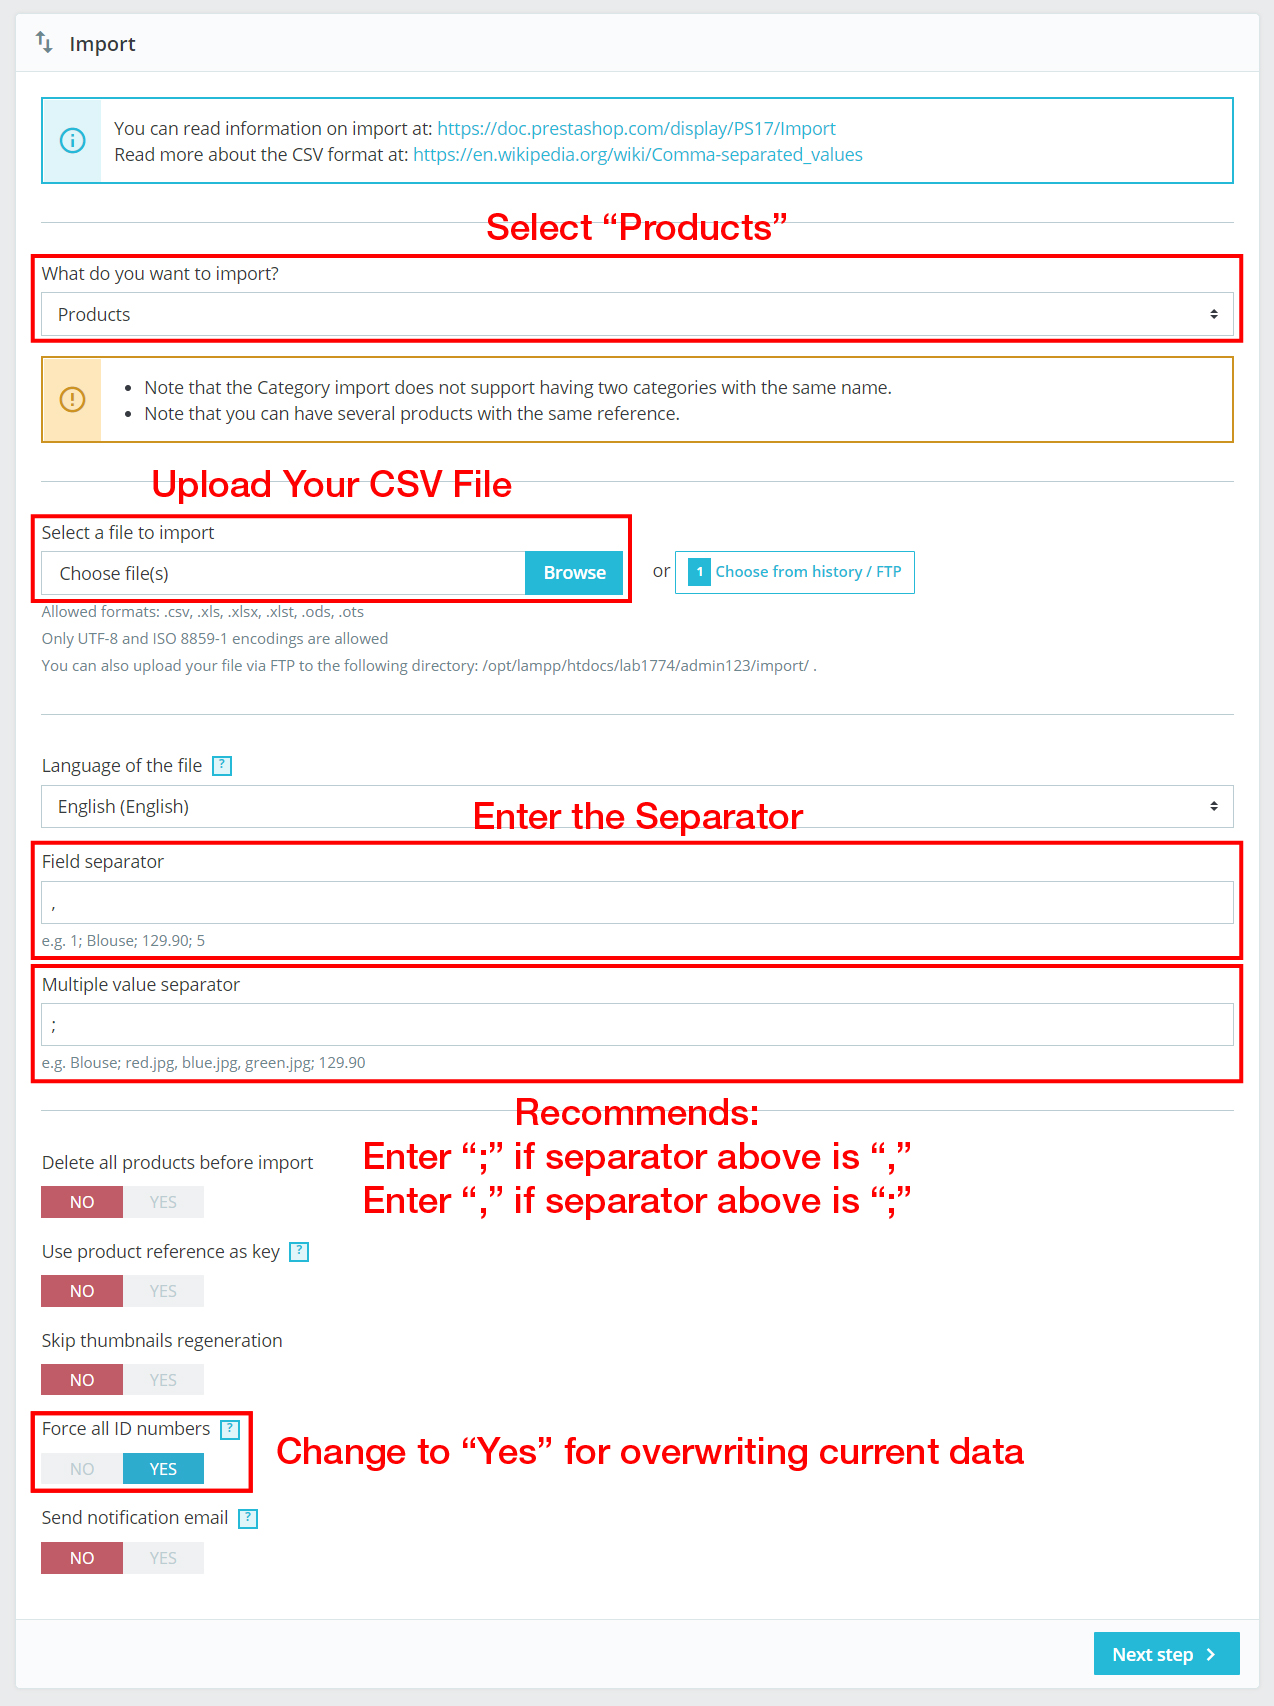
Then we click Next Step and follow the below: